
DIY Willow Garden Obelisk
Materials Needed
80-100 willow rods
Large bucket
String
Scissors
Secateurs
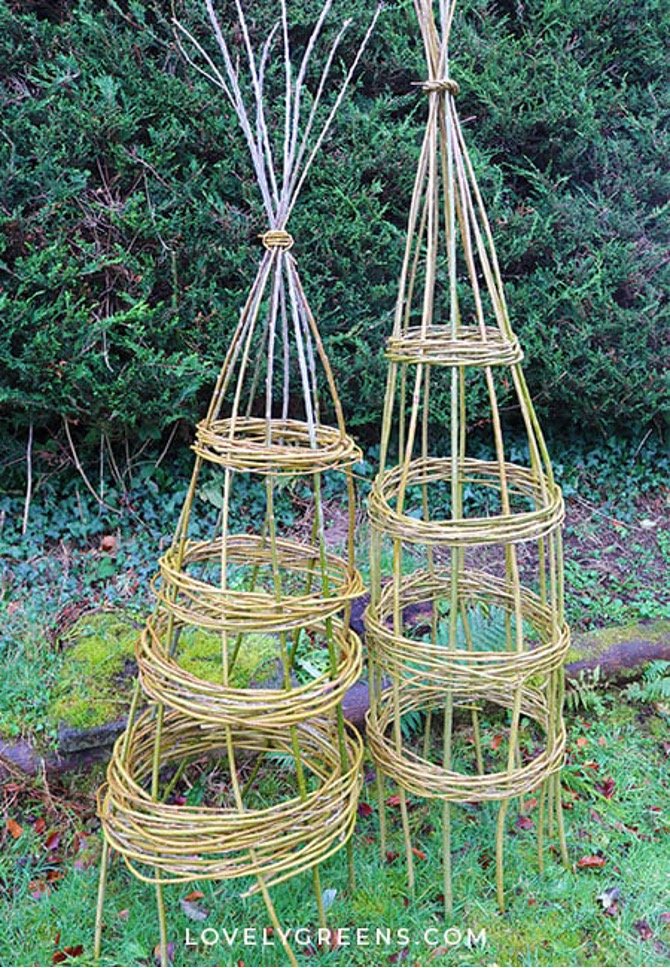
This DIY project involves weaving a garden obelisk from about eighty willow rods.
With thanks to lovelygreens.com – please visit their website and watch the video for more information.
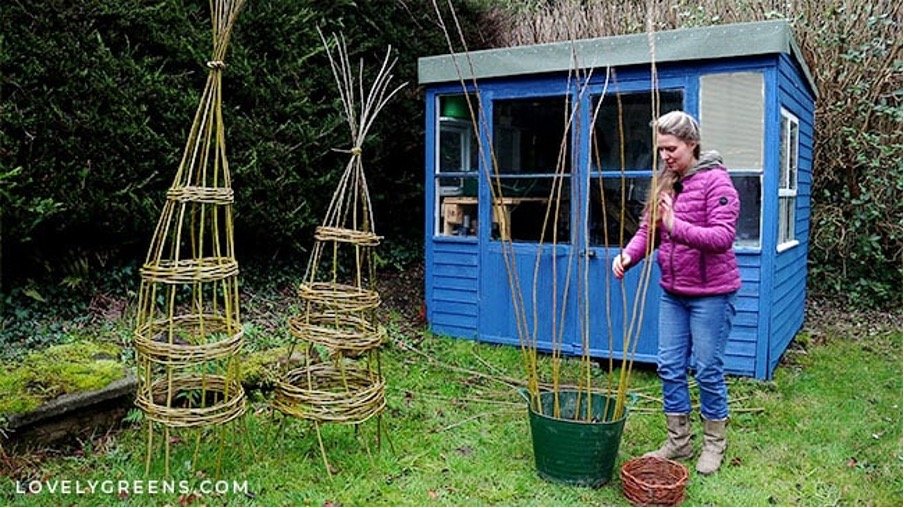
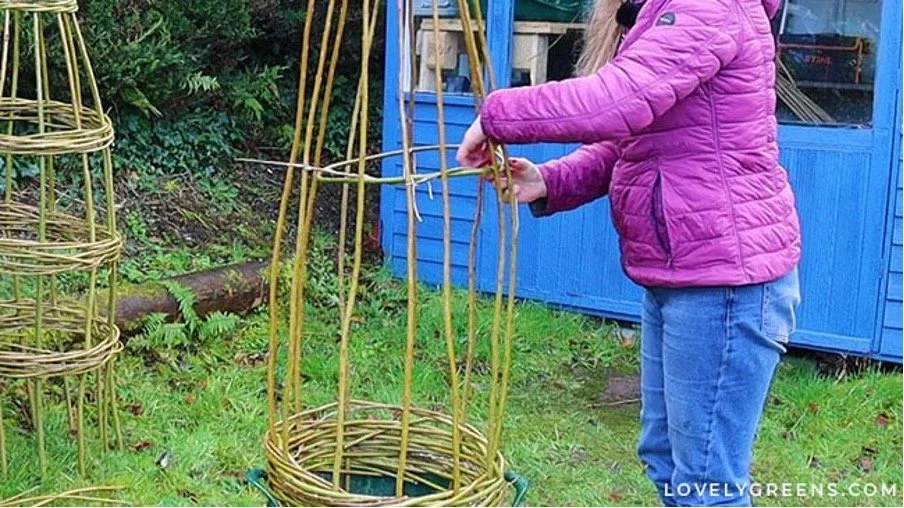
Step 1: Making a Circle with the Verticals. Arrange the verticals in a circle, to create the sides of your wigwam. It can help to place the verticals in a bucket that’s filled with soil or sand. Each vertical should be about four inches from the next, with the thickest part of the willow pushed into the bucket.
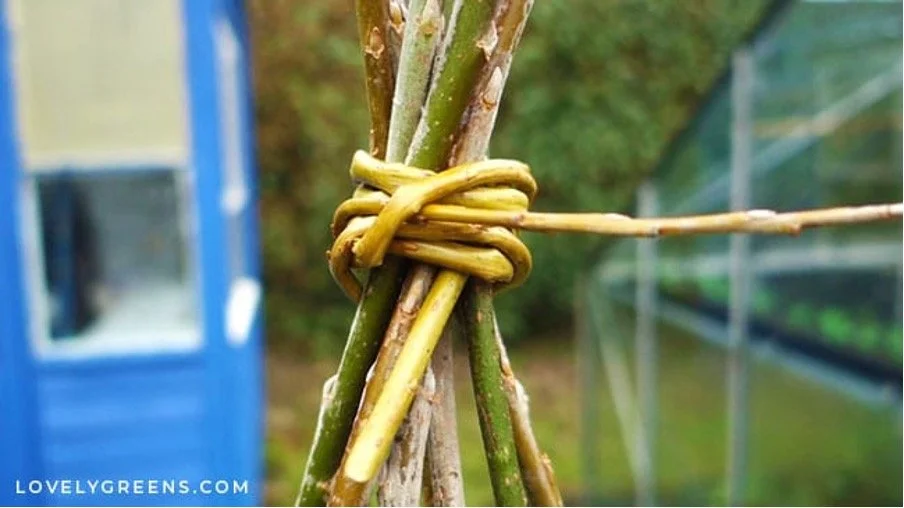
Step 2: Tying the Tops of the Verticals with Willow. A strong willow tie is created by wrapping willow around the verticals. The angle of willow garden obelisks is a gentle curve that finishes on the top with a tie and a filial – the top decoration. Find the thinnest piece of willow in your bundle to create it. Work it with your hands to be flexible and as bendy as possible. Then, place about three to four inches of the thicker end against the verticals, where you’d like your tie to be. Wrap the rest of the piece of willow around this vertical bit of itself. When you get to the end, tuck it into itself to create a tie.
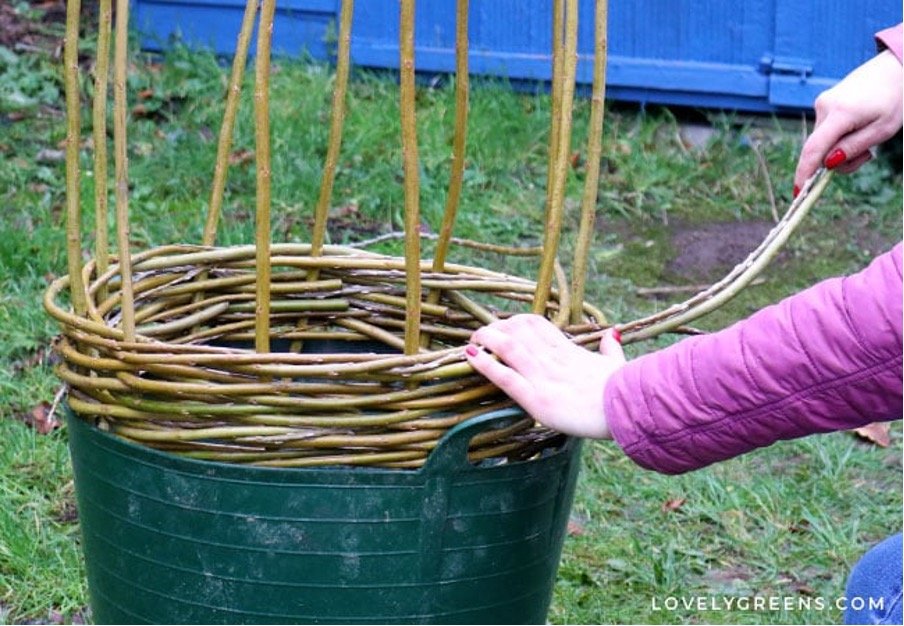
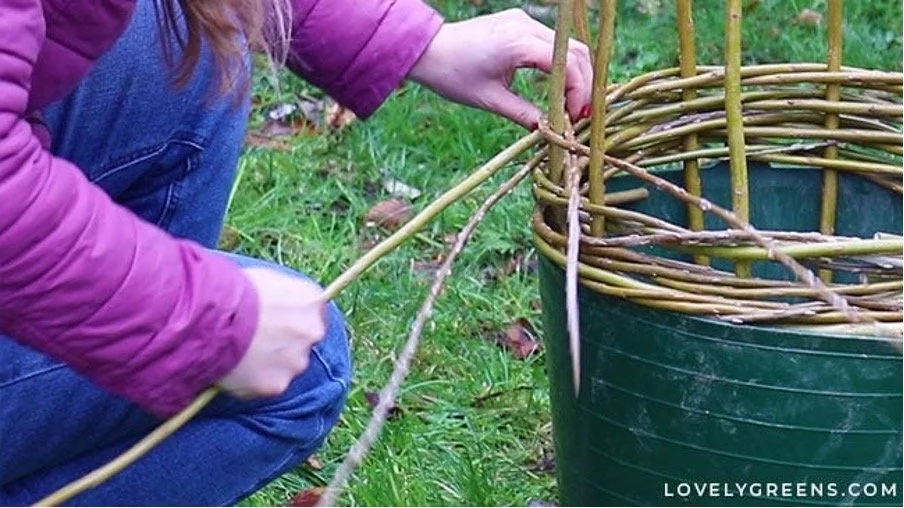
Step 3: Weaving the Bottom Band. Once the long verticals are secured at the top, then begin weaving the bottom band. You can create two to five bands of woven willow along the verticals to give it the strength to support growing plants. The placements of the bands begin at the bottom, along the edge of the container that you’re working from. Begin by using the three-rod wale technique to create a six-inch thick bottom band.
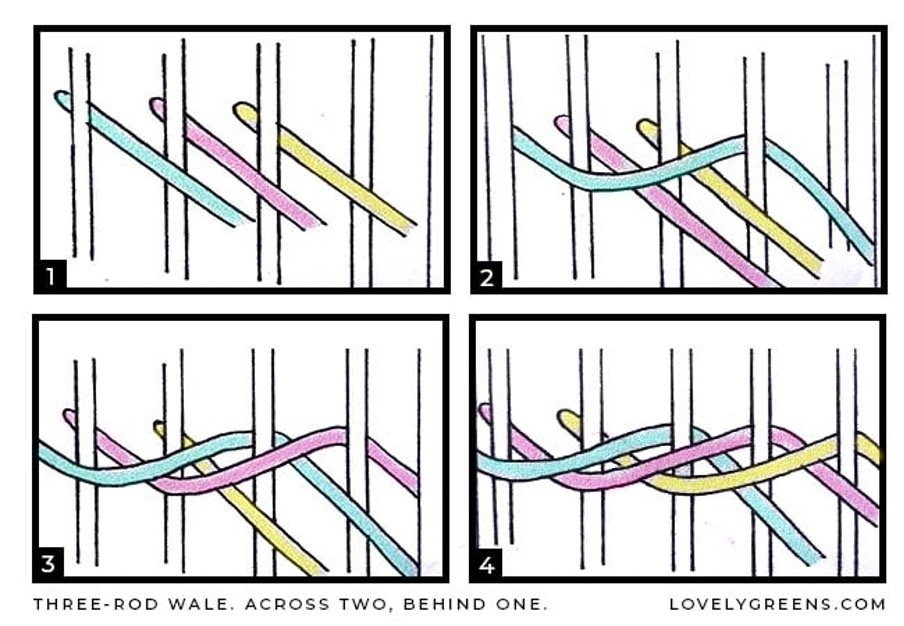
Weaving The Three-Rod Wale. This project is fairly straightforward and the only weaving technique you’ll need to know is the three-rod wale. It involves weaving three rods at the same time and will give your willow garden obelisk strength, stability, and a lovely pattern. It can also be quicker than weaving just a single rod at a time. Start the three-rod wale by placing the thickest ends of three rods just behind three consecutive verticals. Next, take the far left rod and pull it across the face of two of the verticals to its right, then thread it behind the third and then back out. Then move back to the rod at the far left (the original middle rod) and do the same — across two, and behind one. Continue the same ‘across two, and behind one’ with the last rod. Keep repeating this process, always weaving the left-most rod.
How to Add New Rods. When one of your weavers gets too short to reach across two and behind one, then you need to add a new rod. Select a new rod about the same size as the previous one and insert it into the weave. Place it on top of the one you’re replacing, and tuck it behind the last vertical that the old one is placed behind to give it a foothold. There will be other weavers on top of the new rod (from the other two pieces) and they’ll hold it into the place too. Then continue weaving as you were. For that next weave, you’ll go across two and behind one with both the new weaver and old weaver in your hand. As you weave, twist the old one over the top of the new one and it will hold better. If there’s a twiggy little end that sticks out, just tuck it in however best works. Once that first band is around six inches tall, stop adding new rods to the weave. Finish off by tucking in the ends of the last ones into the weave.
Step 4: Creating the Round Template You’ll need to create at least one more band to give the structure stability, if you push down on the obelisk from the top, you’ll see that the structure bows out above the first band. That means that the structure can bow out as weave the second band and you’ll end up with a barrel-shaped obelisk. Thicker around the middle than it is on the bottom. To avoid this, you can create a round template to help the verticals stay straight. Take a piece of willow and twist it into a circle a bit smaller than the diameter of the container. Twist it around itself and it will hold form. Afterward, use string to tie it to the inside of the obelisk above where you plan on constructing the second band, and below where you’ll place the third band. Keep the circle as level as possible, it helps to tie it onto each of the verticals.
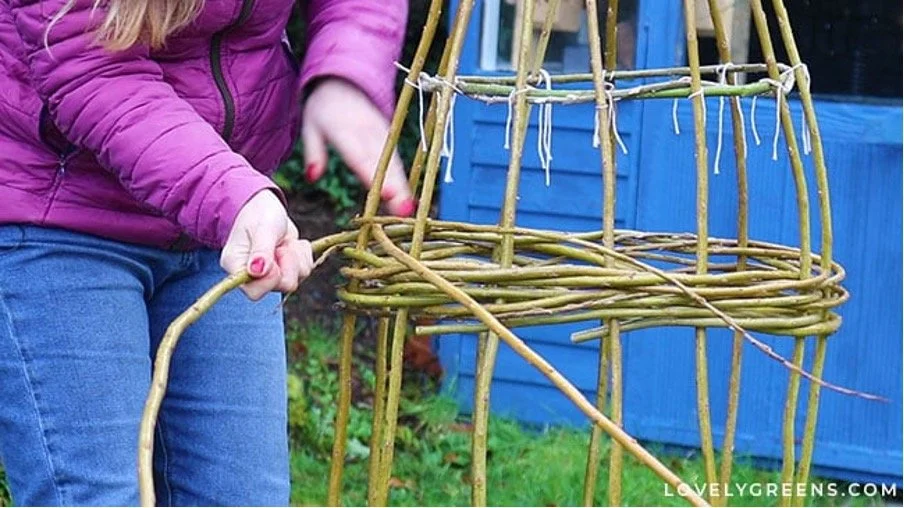
Step 5: Weaving the Middle Band The middle band of woven willow is a little more tricky to get started than the bottom rung. There isn’t the support of the container lip to help hold the three starter rods in place! If you can, ask a friend to hold the ends of the three rods in place while you start a new three-rod-wale a distance below the circular template that you’ve just tied on the verticals. Allow for the height of this second band, which should be four to six inches tall. If you don’t have a friend to help, you can do it yourself. There may be ends popping out but just hold it together and get it started the best you can. A clamp may be useful in holding those three weavers on initially. Weave the second band (the middle band) just below the circular template
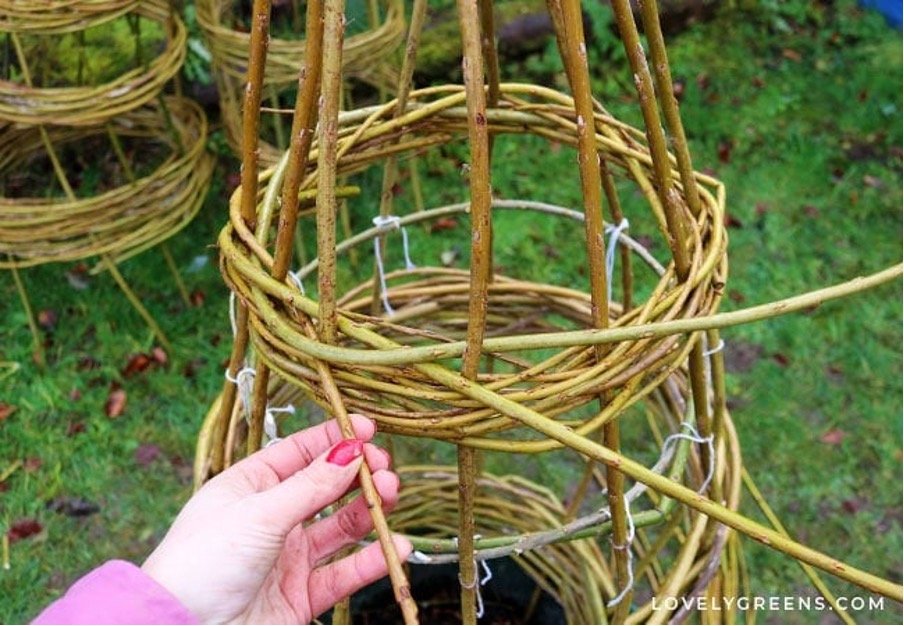
Step 6: Weaving the Top Band Creating it is exactly the same as weaving the other two, except you use the smallest willow rods from your bundle. What to do Next with your DIY Garden Obelisk When you’ve finished weaving the top band, your willow garden obelisk is complete! Remove the circular frame template and make adjustments. Willow is very forgiving when it’s relatively fresh, but once it dries it can become hard and rigid.
You can begin using it to grow your climbing plants right away in the garden, now! Push the legs into the soil and plant around each of the verticals.